
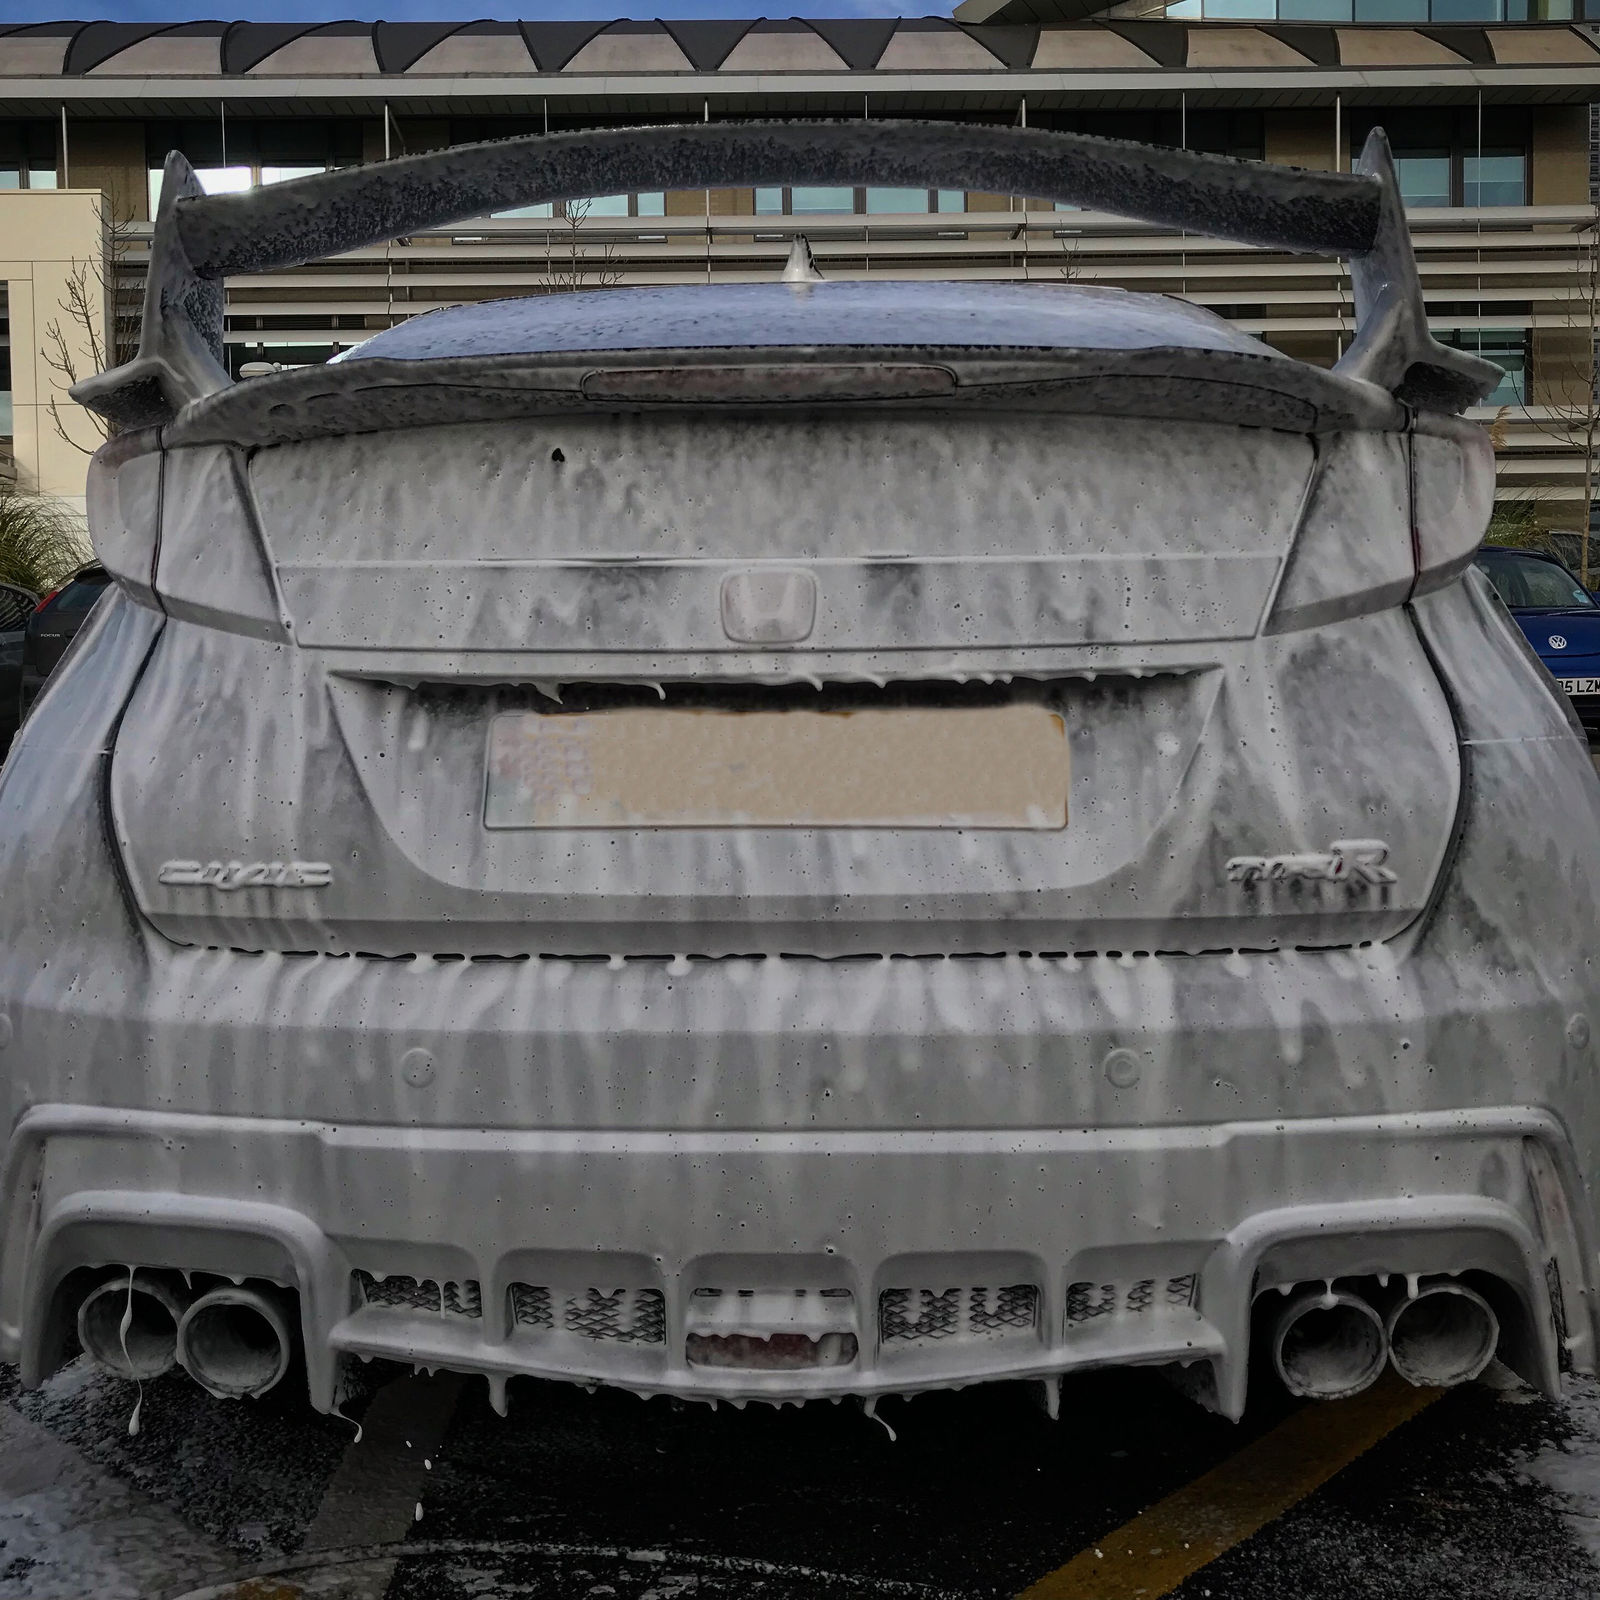
How to perform a safe wash
After your car has been detailed and protected — whether with a ceramic coating, paint protection film or a wax — how you wash it determines how well that protection performs.
Did you know that washing a car incorrectly can create fine scratches in the paintwork with every wash? Over time these scratches (also known as swirls) build up until the paint becomes dull and loses its clarity. You won't see them in the shade, but under sunlight or a bright light they show as fine circular lines radiating around the light source.
At Knight Detailing we wash cars in a way that safely and effectively removes dirt while minimising the chance of causing those fine scratches — and here we show you how to wash your car the same way. Follow this process every time and your protective coating will work to its full potential, with your car staying glossier and cleaner looking than most other cars on the road for years to come.
While car paint appears hard, it marks easily. When your car gets dirty there can be all kinds of particles and grit in that dirt, and fine scratches are caused when those particles are rubbed across the surface. The aim of a safe wash is to remove as much dirt as possible before you ever touch the car by hand.
Equipment list
- Pressure washer
- Snow foam lance
- 3 x 20L buckets with grit guards
- Microfibre wash mitt
- Wheel wash mitt
- Assorted brushes for wheels, grills and trims
- Drying towel and/or car blow dryer
- Deionised water for the final rinse
Product list
All Garage Therapy products, available to buy from Knight Detailing.
- One: Snow foam
- One: Car shampoo
- One: Wheel shampoo
- One: Tyre serum
- One: Glass
- Two: Quick detailer
Before you begin
Whatever equipment and products you use, always follow the manufacturer's instructions and the correct dilution ratios. Wash your car out of direct sunlight, when the panels and wheels are cool, and never let any chemical dry on the car.
Set up first: have the pressure washer ready, your snow foam lance prepared and your three buckets with grit guards filled — one with car shampoo, one with plain water for rinsing, and one with wheel shampoo for the wheels and arches. When you use high quality products they break the dirt down for you, so you should never need to scrub. Keep the pressure washer around a metre from the car; it is there to rinse dirt off, not blast it off.
Step 1: Pre-wash
This is an essential step. A pre-wash breaks down and liquifies dirt, lifting it safely from the surface so it can be rinsed away before you hand wash. Use your snow foam lance to cover the entire car, wheels and arches in foam. It should cling for up to five minutes while the dirt breaks up and drips off in muddy, foamy puddles. Then rinse everything off with the pressure washer, panel by panel. If the car is heavily soiled, pressure wash the thicker dirt off before you snow foam.
Step 2: Wheels, arches and door shuts
Working one wheel at a time, use your wheel mitt and brushes to clean the wheel faces, inside the barrels and the arches, rinsing thoroughly before moving on. For door shuts, inner sills, hinges, the boot compartment and fuel cap, use a shampoo mix in a spray bottle with a soft brush, then rinse carefully with a hosepipe on low pressure or a watering can so water doesn't get inside the car.
Step 3: Hand wash
Dip your wash mitt in the shampoo bucket and, working in areas of two to three feet square, wash using straight, overlapping lines. After each section rinse the mitt in the plain water bucket before picking up fresh shampoo. That way the dirt you remove is trapped under the grit guard in the rinse bucket rather than going back onto the paint.
The lower sections are the dirtiest, so start at the top and work down, finishing at the sills. We wash the top half (bonnet, windows and roof), rinse, then wash the lower half. A very soft brush helps around badges and grills.
Step 4: Rinsing and drying
Rinse all the shampoo off thoroughly with the pressure washer, working from the roof down and flushing out panel gaps, window seals and grills. If you have a deionised water vessel, finish with a DI rinse. Then dry with a microfibre drying towel, a car blower, or both — or, after a DI rinse, simply let the car dry to avoid any chance of marring the paint.
Step 5: Finishing touches
Glass: use a glass cleaner on the windows after washing if needed.
Paint: for extra gloss, slickness and water beading, apply a quick detailer spray one panel at a time with a soft microfibre cloth and buff off with a second clean cloth.
Tyres: make sure the tyres are clean and dry before applying a tyre dressing.
If you'd like any more information on safe wash techniques, don't hesitate to get in touch — we love helping car owners look after their cars.
Ready when you are
Send me a message on WhatsApp with your car's make, model, colour and what you'd like doing — I'll come straight back to you with advice and a price.